Ruby
Ruby
 Golang
 .Net
.Net
 MCP
MCP
 C++
C++
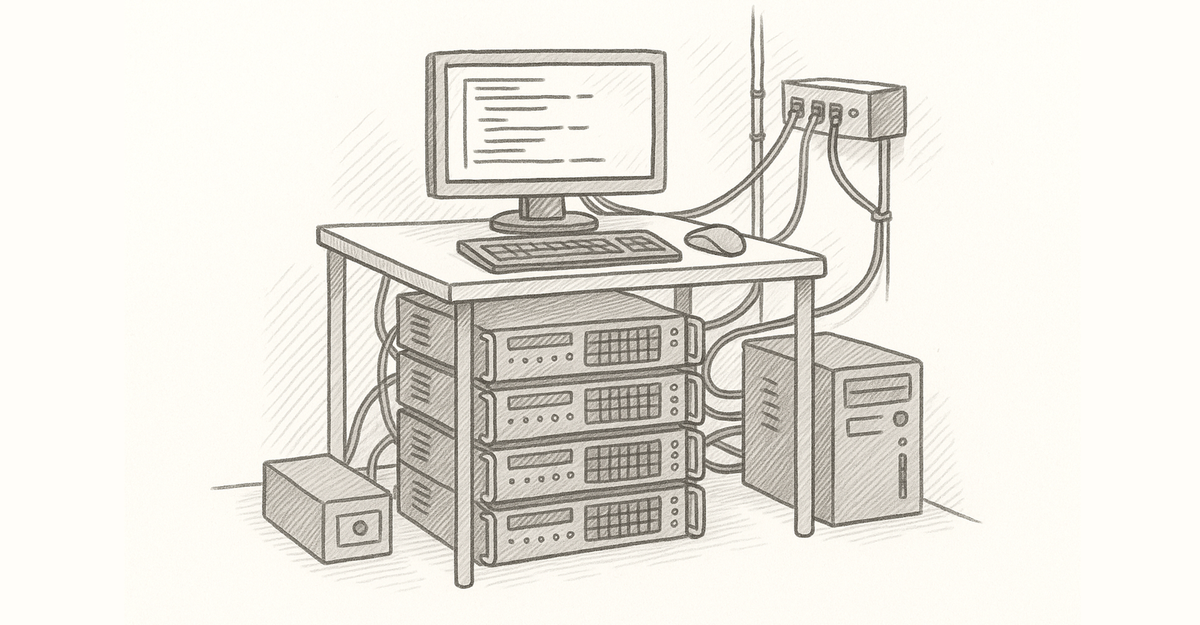
Running your own server on the internet looks challenging, especially if you have never done that. It comes with security risks, performance considerations, and other challenges. It's not surprising that most people therefore opt for hosted solutions or managed platforms to run their applications without thinking too much about the underlying infrastructure.
So what does it take to start self hosting on your own with a Virtual Private Server (VPS)? This guide will walk you through a simple Ubuntu 26.04 LTS setup you can start with. We'll look on the most important considerations when it comes to server configuration whether you are going to deploy Docker Compose, Kamal, Coolify, ONCE, or anything else you'll run.

Server configuration software
There are a few common ways to set up a server. The right approach will depend on your needs. One of the biggest concerns is how many machines are you going to configure and how often.
The most straightforward way to configure a server is to SSH into the server and configure it by hand. That's fine for learning, and it's often how people start. The downside is that manual work is easy to forget and hard to reproduce. Three months later you may not remember which packages you installed, which config files you changed, or why one server behaves differently from another.
You might have seen sysadmins use one of the many configuration management tools. Some of the most famous ones are:
- Ansible — an agentless tool that connects over SSH and uses YAML playbooks to describe what should be installed and configured.
- Chef — a Ruby-based system built around recipes and cookbooks, usually with an agent running on each managed server.
- Puppet — another long-running configuration management tool, built around a declarative language for describing system state.
- SaltStack — a flexible tool that can run with or without agents and is known for managing large fleets quickly.
These tools are excellent when you manage many servers and need consistent, repeatable state everywhere. They help with idempotency, drift detection, orchestration, and auditing. But for a first VPS, they can be more complexity than you need.
It's good to know what you are doing before adopting a higher level tool to automate it. And as we'll see soon enough, you can start with relatively small number of changes that don't even warrant using a complex tool.
So we'll use basic Bash commands, but stack them together in a shell script. A script is easy to read, easy to run, and requires no extra infrastructure. Even better, VPS providers offer you to kickstart your server with something they often call user data and which is technically cloud-init underneath.
Server provisioning with cloud-init
Cloud-init is the standard way to configure a cloud server on first boot. When you create a VPS at providers like DigitalOcean, Hetzner, Linode, or most larger clouds, you usually get a field for user data. Whatever you put there is passed to the new instance and executed during startup.
Cloud-init can process YAML configuration, but it can also run a regular shell script. For this guide, a shell script is the easiest format as you can read it from top to bottom, paste it into a provider's user-data field, or run it manually as root on a fresh server. It's good to design it for idempotency, though, so it can be rerun later.
Main considerations
Let's talk about the main things to consider when starting out as the number of configuration options on a Linux box is limitless. The most important set of changes are security-oriented:
- Disabling password-based authentication to protect unwanted access to the server, ideally paired with limiting access from private network.
- Protecting SSH port from brute-force attacks to slow down repeated SSH login attempts.
- Setting up automatic security updates so important patches are applied without you logging in.
- Configuring firewall to expose only the ports you need on for the networks you trust, ideally paired with cloud (provider's) firewall.
Optionally, you can set up a non-root user for day-to-day administration, disable root SSH login altogether, use SSH keys with passwords, or allow only SSH private network connections in your firewall.
If you are willing to use a 3rd-party service, Tailscale is a popular choice today to secure the access to your servers. Tailscale creates a mesh network between your computer and your servers for direct communication letting you close public access to your SSH port.
Other non-security related changes you might consider:
- Adding Swap space to make small VPS plans more forgiving under memory pressure.
- Installing Docker and other essential software and utilities.
Remember there is way more you tune from more advance SSH configuration to AppArmor or file descriptors. But this is a good start.
Setup script
We'll need to translate these considerations into a reusable script we can pass as user data during the VPS setup. To start we will prepend it with shebang pointing to env bash which is a how to run the right Bash binary (remember that Ubuntu doesn't use Bash as default for users, but we'll use Bash as it's the most common shell). We'll follow it up with running the set command to set certain modes to run the script with.
The script starts would then look like this:
#!/usr/bin/env bash
set -euo pipefail
The set -euo pipefail line makes the script more strict:
set -estops the script when a command fails.set -ustops the script when it references an unset variable.set -o pipefailmakes a pipeline fail if any command in it fails.
It is better to stop early than to continue with a half-configured server. Then before running any specific commands, we'll update the system to latest packages:
apt update;
DEBIAN_FRONTEND=noninteractive apt upgrade -y
The apt update step matters on a fresh cloud image because package indexes can be stale. Without it, package installation may fail even though the package exists.
Your first server configuration
Now let's go through the actual configuration we are going to run in more detail.
SSH Keys
Secure Shell (SSH) is like regular shell on your system, but used to access other systems on the network as if you are the local user. Similarly to a local login, you need to authenticate when accessing remote server. They are two ways to authenticate with SSH; by using passwords or SSH keys.
The password-based authentication is not the secure option today, so the first step for a new box would be to set up password-less authentication using SSH keys. This is usually very simple with modern VPS providers as they offer this option in their provisioning setup when creating a new server.
If you don't have any keys yet, run the following ssh-keygen command and follow its instructions (choosing a password is better but some system admins prefer password-less keys):
ssh-keygen -t ed25519 -C “admin@example.com"In the end you should end up with two keys. The public key will end with .pub and is the one you'll upload on the server. The private one should always stay safe with you and shouldn't be shared.
To completely disable password authentication on the system we need to set PasswordAuthentication to no. This can be done by changing the /etc/ssh/sshd_config config file directly or by appending a file into /etc/ssh/sshd_config.d/.
The following disables password logins entirely:
cat > /etc/ssh/sshd_config.d/91-require-ssh-keys.conf <<'EOF'
PasswordAuthentication no
EOF
sshd -t
systemctl restart ssh
The sshd -t command validates the SSH configuration before restarting the service. If you make a typo, the validation fails and you wan't end up with broken configuration.
fail2ban
Using SSH keys instead of passwords is likely the most important thing to do for a new Linux box, but since SSH ports are often a target, it make sense to monitor who's trying to log in and ban them from trying again.
fail2ban watches authentication logs and temporarily bans IP addresses after too many failed attempts. On modern Ubuntu systems, fail2ban should read SSH logs from journald. What I like the most, is the setup. By just installing the package and running the service, you already get a decent default configuration.
apt install fail2ban
systemctl enable fail2ban.service
systemctl restart fail2ban.service
If we want to make changes to the configuration we can do so by editing the fail2ban's sshd.local file:
# /etc/fail2ban/jail.d/sshd.local
[sshd]
enabled = true
backend = systemd
maxretry = 5
findtime = 10m
bantime = 10m
The enabled = true line makes the SSH jail explicit instead of relying on distribution defaults. This configuration bans an IP for ten minutes after five failed attempts within ten minutes. That is a reasonable starting point for a first server.
Automatic Updates
Running package and software updates is a daily bread of system management. We can make our life a bit easier with automated updates to patch vulnerabilities automatically.
To enable unattended upgrades, we have to first install the unattended-upgrades package:
apt install -y unattended-upgrades
Ubuntu's unattended-upgrades package can install security updates automatically when configured to do so:
printf 'APT::Periodic::Update-Package-Lists "1";\nAPT::Periodic::Unattended-Upgrade "1";\n' > /etc/apt/apt.conf.d/20auto-upgrades
systemctl restart unattended-upgrades
The two configuration lines tell Ubuntu to refresh package lists daily and apply unattended upgrades. By default, Ubuntu limits this mainly to security updates from official repositories, so this is not the same as blindly upgrading every package to a new major version overnight.
Remember that new package versions will only be running after the process restarts and so some key systems components might need a full reboot occasionally.
You can check if you system needs rebooting by running the following reboot-required program:
/var/run/reboot-requiredSchedule a reboot during a maintenance window when required.
Automatic updates do not replace long-term maintenance as you will still need to upgrade the OS before its support window ends. But they cover the dangerous gap between the day a security update is released and the next time you remember to log in to run updates by hand.
Firewall
A firewall is a security system that monitors and controls network traffic. It allows or denies connections based on predefined rules. Firewall rules are mostly about narrowing connections to allowed ports and protocols. Each cloud instance can come with its own firewall and each Linux box will also come with a system firewall.
Creating firewall rules is easier than it looks once you understand what you need to do. Cloud firewalls also often make it easy by letting you assign resources you have already without remembering their exact IP address. You should also set up a system firewall, even if less strict (it's easier to add rules in your provider's interface and not lock yourself up).
Here's an example of firewall rules for a single server Kamal deployment:
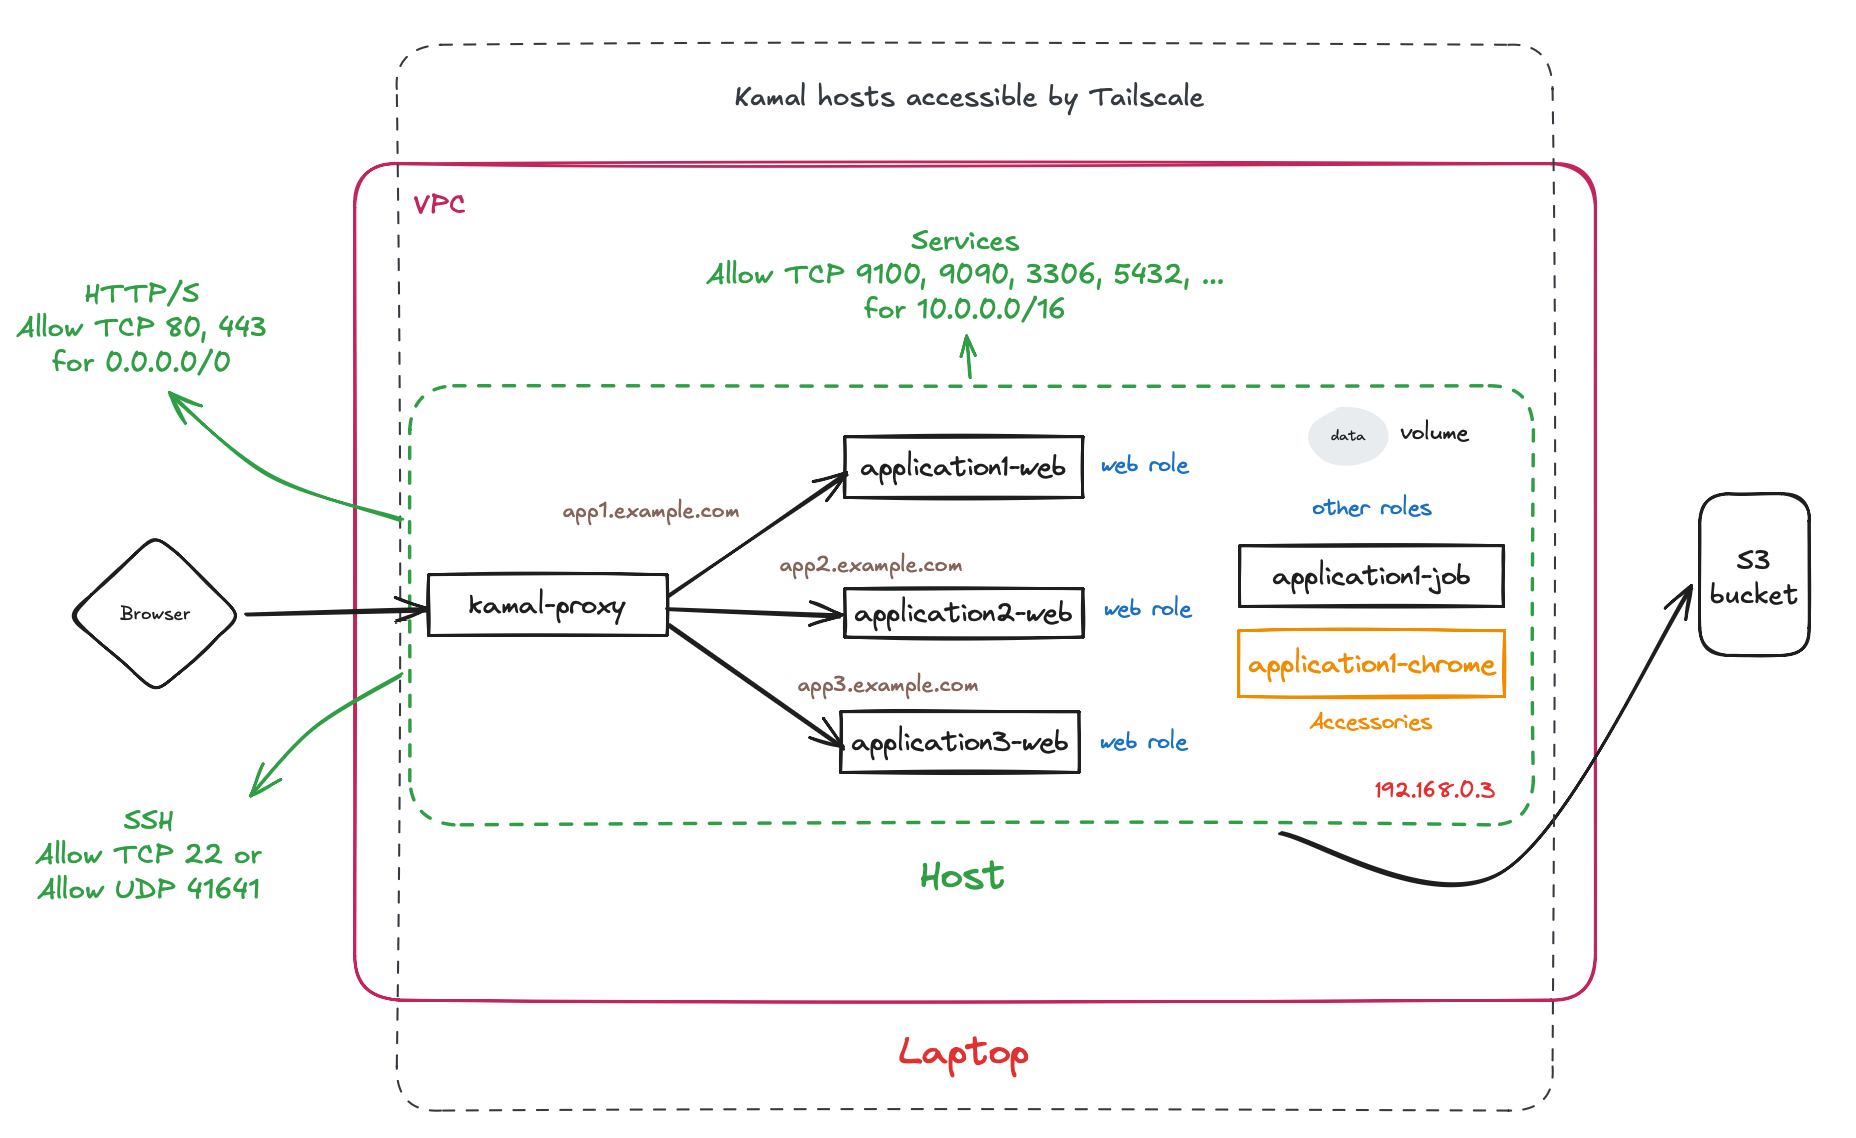
A good rule of thumb is to deny all connections by default and allow connections we expect to have. Instead of exposing every service you are running and hoping each one is safe, you deny incoming traffic by default and open only the ports you actually need.
So what do you usually need? The ports 80 and 443 are for public HTTP and HTTPS traffic. The port 22 is for SSH. Those need to be reachable from outside if you want to serve web traffic and administer the machine remotely.
Then you'll need to allow incoming connections for your services. Since they usually only need to be accessed internally, you should limit them to your private subnet (IP addresses that are accessed only from your network of servers).
Some popular ports include:
3000for an application server3306for MySQL or MariaDB5432for PostgreSQL6379for Redis
If you aren't exactly sure about your private subnet address space, it's usually save to default to 10.0.0.0/16 although you should always recheck with your provider.
Cloud firewall are set directly in the provider's admin area:

The exact location depends on the provider, could be under VM settings or separately under Security or Firewalls. You can sometimes design the rules based on descriptive names instead of raw data (HTTPS instead of 443, All IPv4 addresses instead of 0.0.0.0/0).
For, Ubuntu's UFW (the system firewall) we can set the rules with ufw commands:
ufw default deny incoming
ufw default allow outgoing
ufw allow 80/tcp
ufw allow 443/tcp
ufw allow 22/tcp
ufw allow from "10.0.0.0/16" to any port 3000 proto tcp
ufw allow from "10.0.0.0/16" to any port 3306 proto tcp
ufw allow from "10.0.0.0/16" to any port 5432 proto tcp
ufw allow from "10.0.0.0/16" to any port 6379 proto tcp
ufw logging on
ufw --force enable
This is the model you usually want: public web traffic comes in through HTTP/HTTPS, while databases and internal services stay on a private network. Your database should not be directly reachable from the public internet. You need to update this to your exact setup.
UFW uses nftables under the hood on current Ubuntu releases, but the user-facing commands are the same. You can keep using simple ufw allow, ufw deny, and ufw status commands without learning nftables directly. The ufw logging on line is useful when something cannot connect and you need to see whether the firewall is blocking it.
Opening SSH to the whole internet is simple, but it is not the only option. If you have a stable home IP, you can restrict SSH to that address. If you use Tailscale, you can eventually move administration onto the private network. For a first server, global SSH plus key-only login and fail2ban is a practical starting point.
Non-root user
It's better not to use the root user for everyday work as it's a privileged user that can do anything on the system. It's also the obvious attack vector for any malicious actor stealing your SSH private key.
We can create a non-root user with sudo access which gives the user the superpowers it needs to manage everything like root, but would require another information for the attacker to know.
USER=[USERNAME]
useradd --create-home $USER
usermod -s /bin/bash $USER
su - $USER -c 'mkdir -p ~/.ssh'
su - $USER -c 'touch ~/.ssh/authorized_keys'
cat /root/.ssh/authorized_keys >> /home/$USER/.ssh/authorized_keys
chmod 700 /home/$USER/.ssh
chmod 600 /home/$USER/.ssh/authorized_keys
echo "$USER ALL=(ALL:ALL) NOPASSWD: ALL" | tee /etc/sudoers.d/$USER
chmod 0440 /etc/sudoers.d/$USER
visudo -c -f /etc/sudoers.d/$USER
usermod -aG docker $USER
This creates a home directory, sets bash as the login shell, prepares ~/.ssh, and installs an SSH key for the new user. We are recreating root as a different user in a way.
The NOPASSWD: settings let our user to run privileged commands without any additional password. You can set a password here, but it can make it difficult for running scripts. The visudo -c check is important because it validates the sudoers file before you rely on it. A broken sudoers file can leave you unable to use sudo.
Although not completely necessary (a lot of system admins keep the root login today depending on all the other protections), adding a non-root user can make your configuration quite a bit more secure.
Disabling root access
Once your non-root user works, you can close the login access for root. Similarly to previous SSH settings we can either edit /etc/ssh/sshd_config or drop a new config file to /etc/ssh/sshd_config.d/:
cat > /etc/ssh/sshd_config.d/92-disable-root-login.conf <<'EOF'
PermitRootLogin no
EOF
sshd -t
systemctl restart ssh
The settings we need this time is PermitRootLogin no.
Swap
Small VPS plans often come with 1GB or 2GB of RAM. That may be enough most of the time, but a web server, database, background jobs, deployments, and package upgrades can occasionally push memory usage higher than expected. If you use all the available RAM, processes start to crash.
Swap space lets the Linux kernel move less-used memory pages from RAM to disk so active processes can keep running. Accessing disk space is way slower than RAM, but it can prevent an out-of-memory crash in a traffic spike.
To allocate swap space we'll use the fallocate program, then make it the swap space with mkswap and swapon. Last, we can configure the swappiness parameter in /etc/sysctl.conf:
fallocate -l 2GB /swapfile
chmod 600 /swapfile
mkswap /swapfile
swapon /swapfile
echo "\\n/swapfile swap swap defaults 0 0\\n" >> /etc/fstab
sysctl vm.swappiness=20;
echo "\\nvm.swappiness=20\\n" >> /etc/sysctl.conf
The vm.swappiness=20 setting tells the kernel to prefer RAM and use swap only when needed. A value around 10 to 20 is a good starting point for a VPS. The /etc/fstab line makes the swapfile survive reboots. Without it, swap would work only until the next restart.
Docker
Now if you are going to deploy things with Docker, be it using Docker Compose, Coolify, Kamal, or anything else, you might preinstall Docker in this provisioning step as well. Some tools, like Kamal, can install Docker automatically, but it might be useful to preinstall it the way you want.
You have several options:
- Ubuntu's docker.io system package
- The Docker Snap package
- Docker's official docker-ce packages
They differ in their update policies and Snap also differ in ways it works (which is the reason it's often not compatible with other software like Kamal).
To install it, just add another apt install command:
apt install -y docker.ioIf you are using a non-root user for your operations, you might want to add it to a docker group which will let it run privileged Docker commands:
usermod -aG docker [USERNAME]A full example
Now let's see how such a cloud-init script can look like in full with most of the options from this article:
#!/usr/bin/env bash
set -euo pipefail

# Provide these variables to use as a standalone script
USER=${USER}
NAME=${NAME}

echo "Configuring the system $NAME for user $USER"

# Do a system update
apt update;
DEBIAN_FRONTEND=noninteractive apt upgrade -y

# Install essential packages
apt install -y docker.io curl unattended-upgrades fail2ban

# Set up unattented updates
echo -e "APT::Periodic::Update-Package-Lists \"1\";\nAPT::Periodic::Unattended-Upgrade \"1\";\n" > /etc/apt/apt.conf.d/20auto-upgrades
/etc/init.d/unattended-upgrades restart

# Install fail2ban
systemctl start fail2ban.service
systemctl enable fail2ban.service

# Configure firewall
ufw logging on;
ufw default deny incoming;
ufw default allow outgoing;

ufw allow 80;
ufw allow 443;
ufw allow 22;

ufw allow from 10.0.0.0/16 to any port 3000;
ufw allow from 10.0.0.0/16 to any port 3100;
ufw allow from 10.0.0.0/16 to any port 3306;
ufw allow from 10.0.0.0/16 to any port 5432;
ufw allow from 10.0.0.0/16 to any port 6379;
ufw allow from 10.0.0.0/16 to any port 9090;
ufw allow from 10.0.0.0/16 to any port 9100;

ufw --force enable;
systemctl restart ufw.service

# Add swap space
fallocate -l 2GB /swapfile
chmod 600 /swapfile
mkswap /swapfile
swapon /swapfile
echo "\\n/swapfile swap swap defaults 0 0\\n" >> /etc/fstab
sysctl vm.swappiness=20;
echo "\\nvm.swappiness=20\\n" >> /etc/sysctl.conf

# Add non-root user
useradd --create-home $USER
usermod -s /bin/bash $USER
su - $USER -c 'mkdir -p ~/.ssh'
su - $USER -c 'touch ~/.ssh/authorized_keys'
cat /root/.ssh/authorized_keys >> /home/$USER/.ssh/authorized_keys
chmod 700 /home/$USER/.ssh
chmod 600 /home/$USER/.ssh/authorized_keys
echo "$USER ALL=(ALL:ALL) NOPASSWD: ALL" | tee /etc/sudoers.d/$USER
chmod 0440 /etc/sudoers.d/$USER
visudo -c -f /etc/sudoers.d/$USER
usermod -aG docker $USER

# Disable root access
sed -i 's@PasswordAuthentication yes@PasswordAuthentication no@g' /etc/ssh/sshd_config
sed -i 's@PermitRootLogin yes@PermitRootLogin no@g' /etc/ssh/sshd_config

systemctl restart ssh.service
After your system is fully provisioned, make sure to update the cloud's firewall and optionally configure some system monitoring. Some providers come with built-in monitoring that will work automatically if you opt-in into installing their package during a setup step.
You might also want to enable full virtual server backups as most providers support them. They will snapshot the entire virtual server which can come in handy when things go wrong (note they usually cost extra).
Troubleshooting
If your custom configuration didn't work for some unknown reason and you need to debug what went wrong with your script, log in to the machine using your SSH key and have a look at cloud-init log:
sudo cat /var/log/cloud-init-output.logThey are also other locations to check.
Next steps
Once you have your server up and running, you can continue to improve the configuration, install a PaaS like Coofily, or start self-hosting with Kamal.
Have a look at some of our other posts on self hosting to get you started with that: